Let’s learn step by step to setup AutoResponder using cPanel.
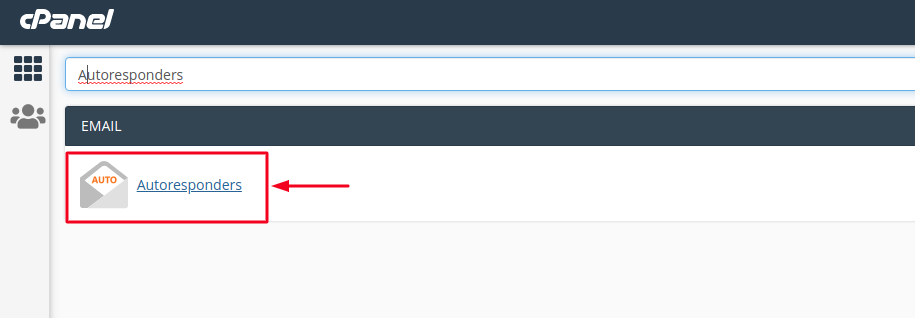
- Login to cPanel account and search for Autoresponders option and click on it.

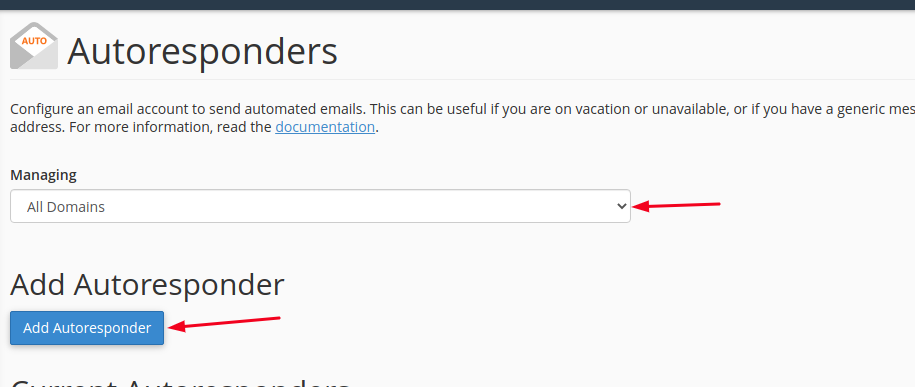
- On this new page, you can see all your previous added Autoresponders, in case you have added any before. To add a new Autoresponder, choose your domain name from the drop-down menu showing below “Managing.”
Then click on Add Autoresponder button.

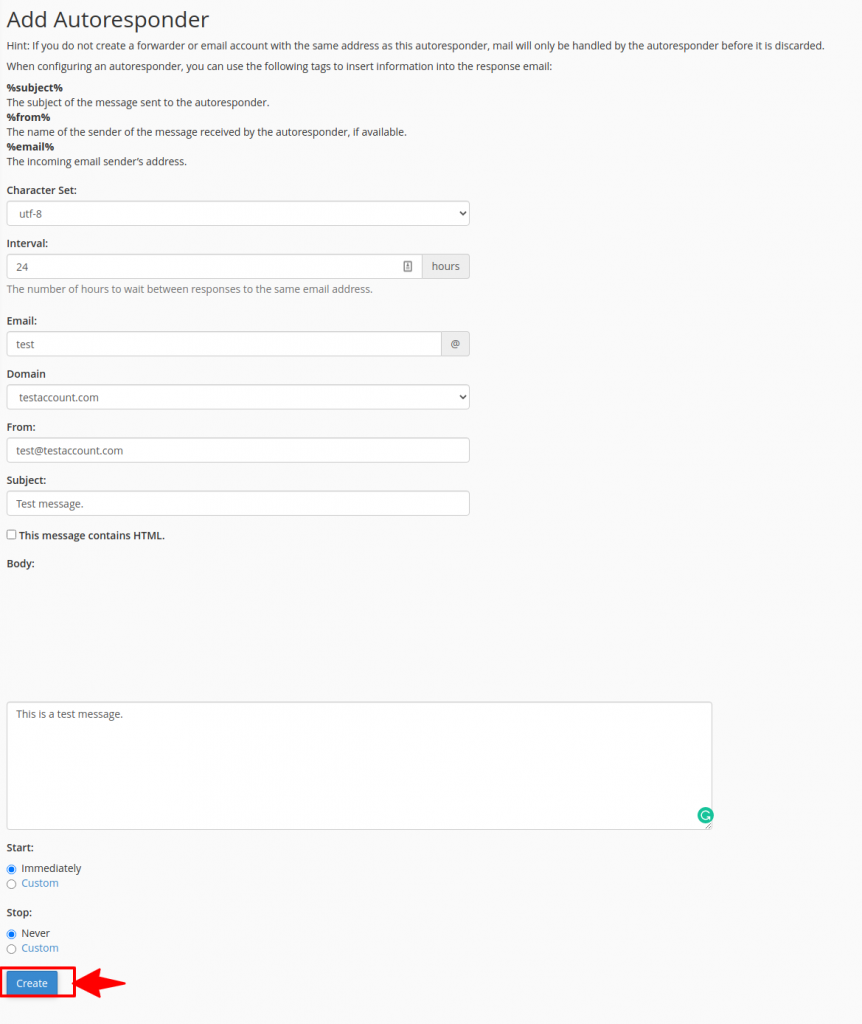
- On the next page, you will see tons of Settings. I will explain you all of them in detail below.
- Character Set – By default it’s, utf-8, don’t change it.
- Interval – The number of hours to wait between responses to the same email address.
- Email – It’s the email address, for which, you’re going to set up an autoresponder.
- Domain – It’s the domain name you have chosen in the previous step, or you can still select the domain name from the drop-down menu.
- From – You can use any other email address here, but I recommend you use the same email address.
- Subject – Fill a subject line, for example, “Sanjay is out of town, he will contact you soon.”
- HTML – If you want to add HTML, you can check the box, otherwise, no need.
- Body – This is the box where you have to enter your autoresponder message.
- Start – You can choose to start an autoresponder Immediately or prefer a custom time.
- Stop – You can select a custom date to stop your autoresponder or you can chose Never in case you need for a long time.


Once you are done filling up all the fields as per your requirement, click on Create button.
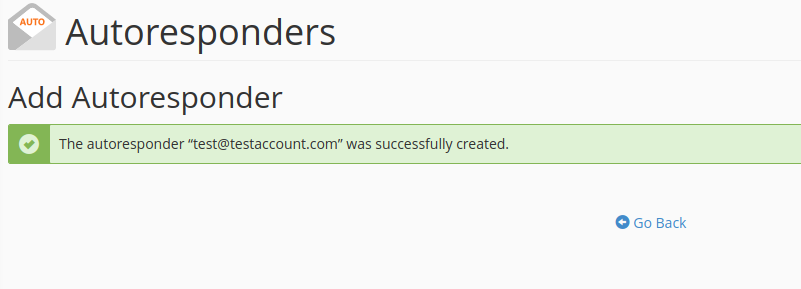
You will then see a success message as The autoresponder was successfully created notifying you that your Task has been completed now.
I hope now you can easily set up autoresponders for your Email accounts.
