
How to Add DNS Records from cPanel
This article explains how to add and manage DNS records (A, CNAME, MX, and TXT) using the Zone Editor in cPanel.
Log in to your cPanel account.
After successful login, the cPanel dashboard will be displayed.
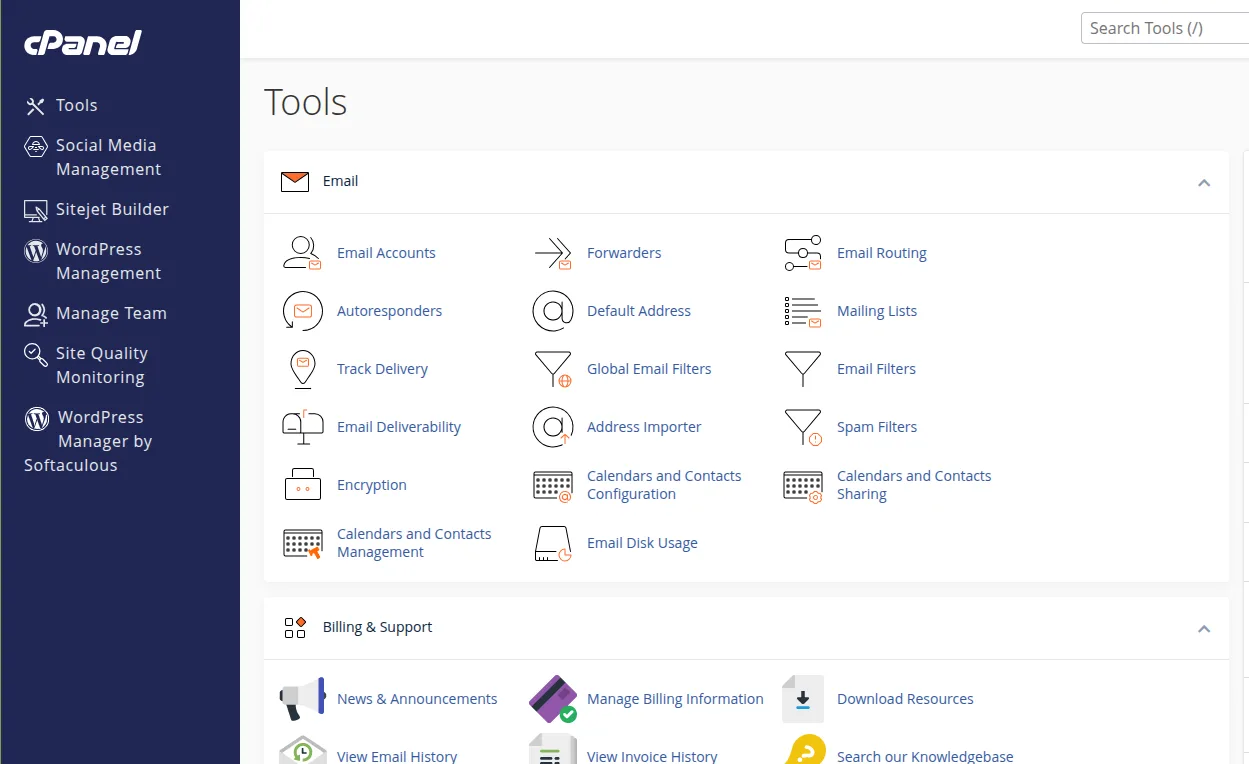
Step 2: Open Zone Editor
Locate the search bar on the left-hand side of the cPanel dashboard.
Type Zone Editor in the search field.
Click Zone Editor from the search results.
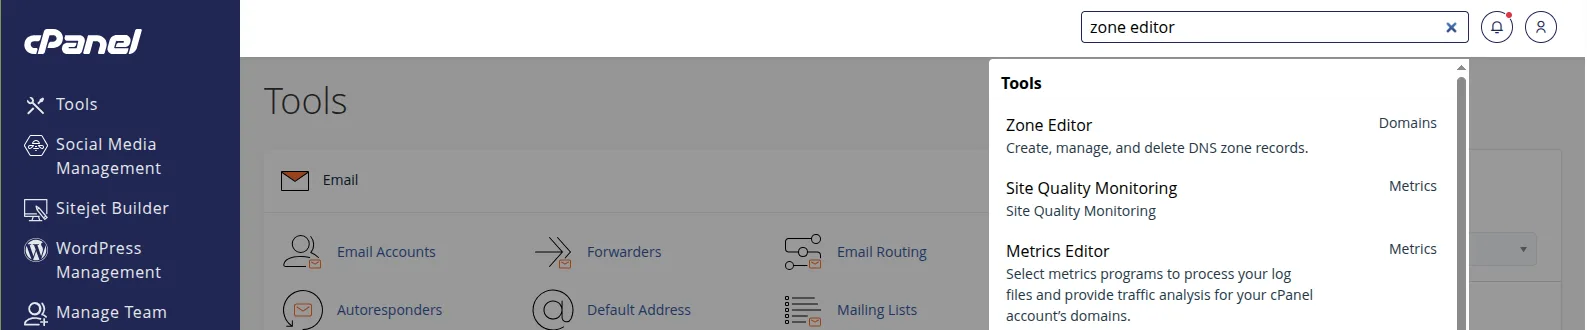
Step 3: Select the Domain
A list of domains hosted under the cPanel account will be displayed.
Locate the domain for which you want to manage DNS records.
Click the Manage button next to the required domain.
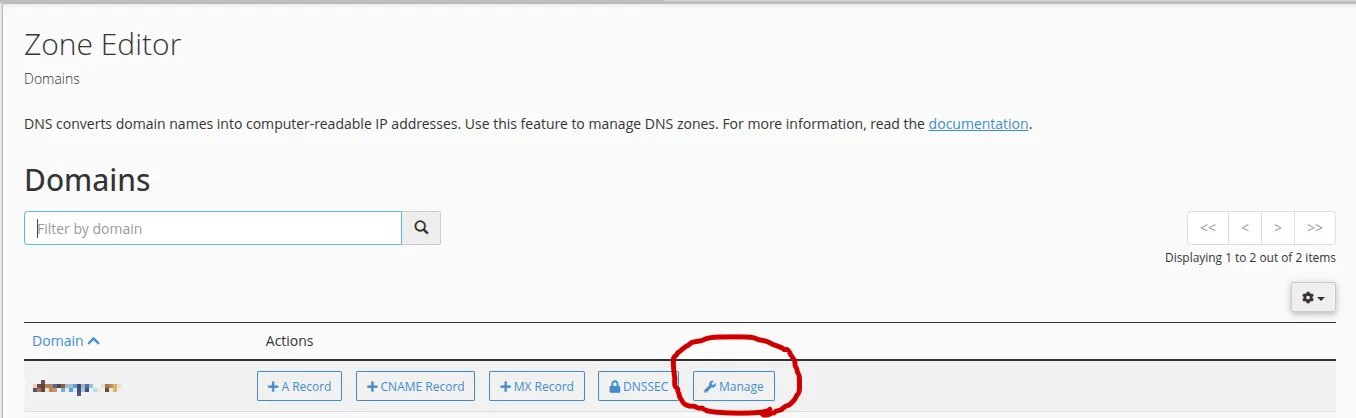
Step 4: Add or Edit DNS Records
After clicking Manage, you will be redirected to the DNS Zone Management interface where records can be added, modified, or deleted.
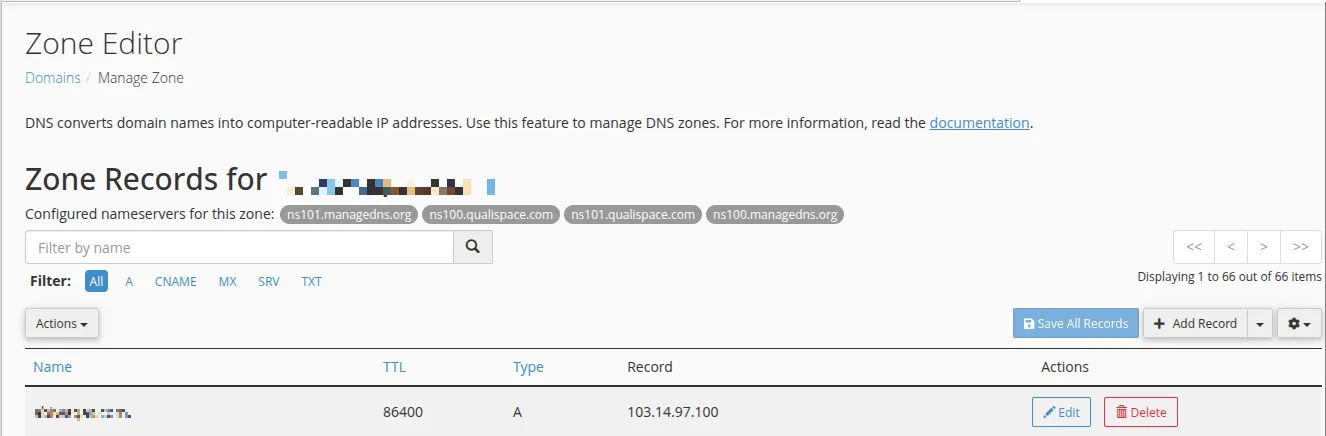
Step 4(a): Add an A Record
Click + Add Record.
Select A Record.
In the Valid Zone Name field, enter the hostname.
Examples:
domain.comwww.domain.com
In the Record field, enter the destination IP address.
Click Save Record.
Example:
Plain Text
Hostname: www.domain.com
Record: 192.168.1.100

Step 4(b): Add a CNAME Record
Click + Add Record.
Select CNAME Record.
In the Valid Zone Name field, enter the host value.
In the Record field, enter the destination value provided by the service provider.
Click Save Record.
Example:
Plain Text
Hostname: mail.domain.com
Record: ghs.googlehosted.com

Step 4(c): Add an MX Record
Click + Add Record.
Select MX Record.
In the Valid Zone Name field, enter the hostname.
Example:
Plain Text
domain.com
In the Priority field, enter the priority value provided by the mail service provider.
In the Destination field, enter the mail server address.
Click Save Record.
Example:
Plain Text
Hostname: domain.com
Priority: 0
Destination: mail.domain.com

Step 4(d): Add a TXT Record
Click + Add Record.
Select TXT Record.
In the Valid Zone Name field, enter the hostname.
Example:
Plain Text
domain.com
In the Record field, enter the TXT value provided by the service provider.
Click Save Record.
Example:
Plain Text
v=spf1 include:spf.protection.outlook.com -all

Verification
Confirm that the newly added record appears in the DNS record list.
Verify the values are correct.
Allow DNS propagation time if required.
Test the service associated with the record:
Website accessibility for A records
Alias resolution for CNAME records
Email delivery for MX records
Domain verification for TXT records
Troubleshooting
Record Not Working
Verify that the correct record type was selected.
Verify that the hostname and destination values were entered correctly.
Check for duplicate or conflicting DNS records.
Email Issues After MX Changes
Verify MX priority values.
Confirm the mail server address provided by the email service provider.
Domain Verification Fails
Ensure the TXT value matches exactly what was provided by the service provider.
Wait for DNS propagation to complete.
DNS Changes Not Applied
Clear local DNS cache.
Check DNS propagation using online DNS lookup tools.
Allow up to 24-48 hours for global DNS propagation if required.
- cPanel
- dns records
- zone editor