
How to Install and Remove WordPress Plugins in Plesk
This article explains how to install and remove WordPress plugins using the WP Toolkit in Plesk.
Applies To
Plesk Obsidian (Web Pro, Web Host editions include WP Toolkit by default)
WordPress 4.9 or later
Symptoms
Need to add new functionality to a WordPress site.
Need to remove unused or problematic plugins.
Resolution
Install a Plugin
Login to Plesk Panel.
Navigate to Websites & Domains.
Click WordPress.
Go to the Plugins tab.
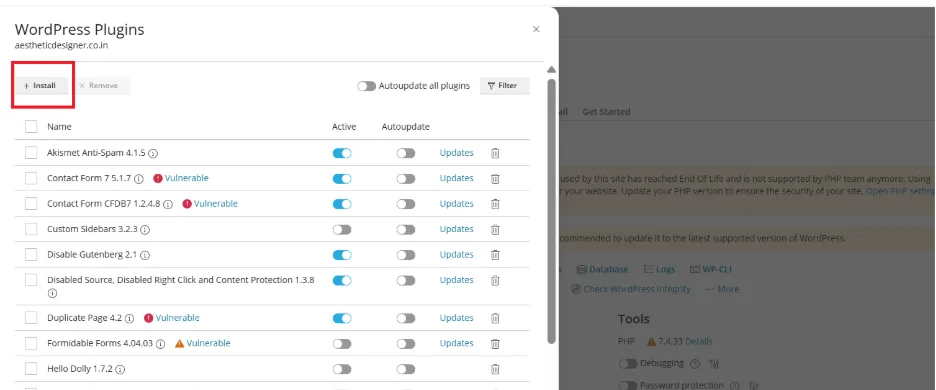
Click Install.
Select the desired plugin from the catalog or upload a .zip file.
Click Activate to enable the plugin.
Remove a Plugin
Login to Plesk Panel.
Navigate to Websites & Domains.
Click WordPress.
Go to the Plugins tab.
Select the plugin name checkboxes you want to remove.
Click Uninstall
Verification
After installation: Confirm the plugin appears in the WordPress admin under Plugins > Installed Plugins and is active.
After removal: Confirm the plugin no longer appears in the list.
Troubleshooting
If installation fails, check internet connectivity (WP Toolkit retrieves plugins from wordpress.org).
If removal fails, ensure the plugin is deactivated first.
Always back up your WordPress site before adding or removing plugins.
If issues persist, contact your hosting provider or Plesk support.
- wordpress