
How_to_Add_DNS_Records_from_Plesk
This article explains how to add and manage DNS records (A, CNAME, MX, and TXT) from the Plesk Control Panel using the DNS Management interface.
Applies To
Plesk Obsidian
Plesk Web Hosting
DNS Management
Domain Hosting
Symptoms
Need to point a domain or subdomain to a server.
Need to configure email services such as Microsoft 365 or Google Workspace.
Need to verify domain ownership with a third-party provider.
Need to add or modify DNS records for a website or application.
Existing DNS records require updates.
Cause
DNS records are required to route website traffic, email services, and domain verification requests correctly. Incorrect or missing DNS records may result in website downtime, email delivery issues, or service verification failures.
Resolution
Step 1: Log in to Plesk
Log in to your Plesk Control Panel.
After successful authentication, the Plesk dashboard will be displayed.
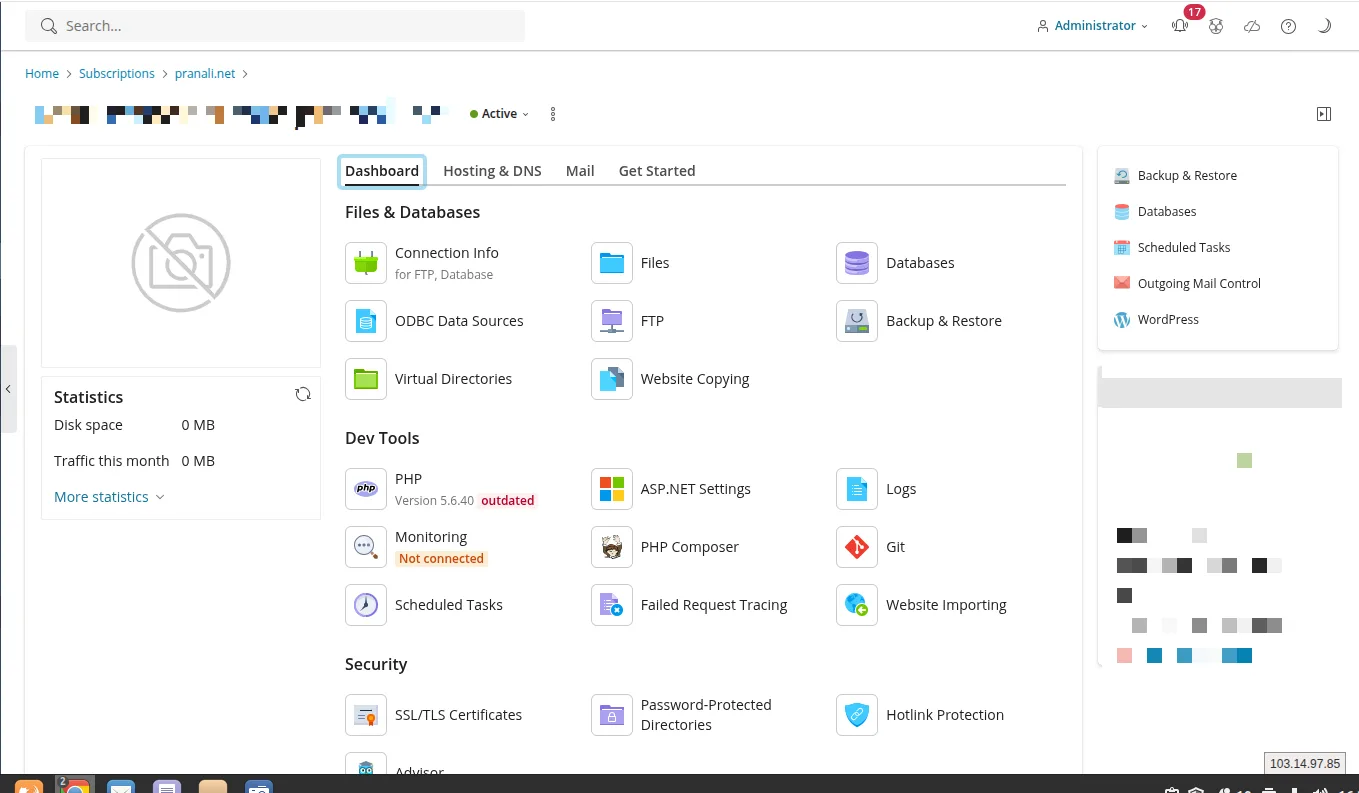
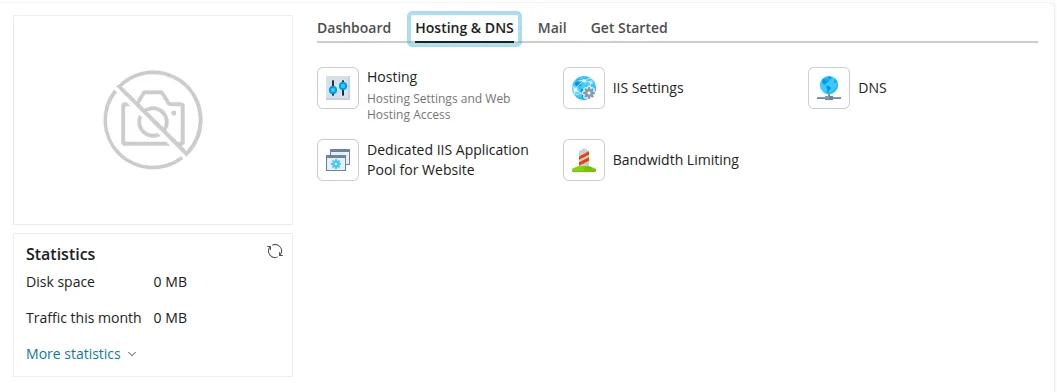
Step 2: Open DNS Management
Select the required domain from the dashboard.
Click Hosting & DNS.
Click DNS to open the DNS Management interface.
Step 3: Add DNS Records
Click + Add Record.
Select the required record type.
Enter the details provided by your service provider.
Save the record.

Step 3(a): Add an A Record
Click + Add Record.
Select A Record.
In the Domain Name field:
Leave the field as-is for the root domain, or
Enter the required subdomain.
In the IP Address field, enter the destination server IP address.
Click OK or Save.
Example:
Plain Text
Domain Name: www
IP Address: 192.168.1.100
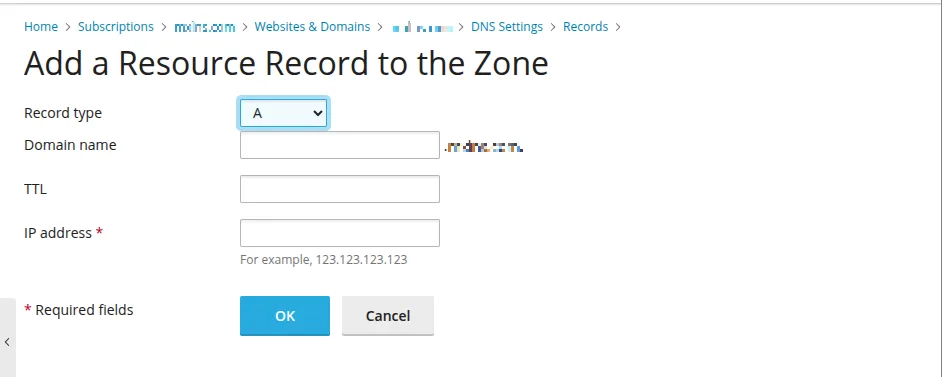
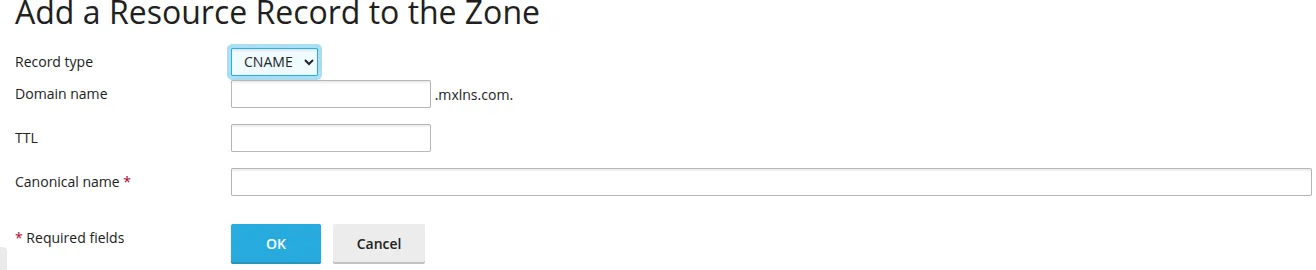
Step 3(b): Add a CNAME Record
Click + Add Record.
Select CNAME Record.
In the Domain Name field, enter the host value provided by the service provider.
In the Canonical Name field, enter the target value provided by the service provider.
Click OK or Save.
Example:
Plain Text
Domain Name: mail
Canonical Name: ghs.googlehosted.com
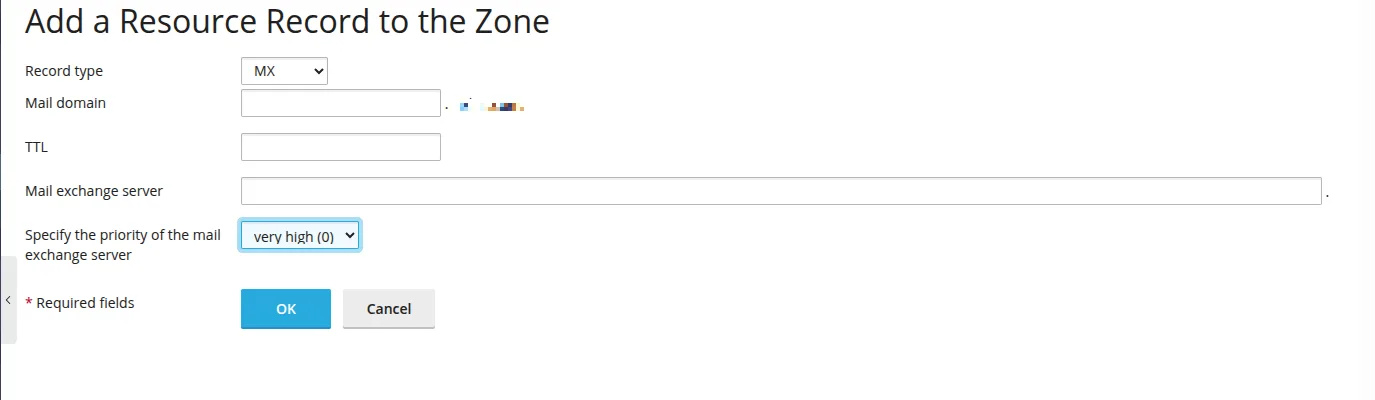
Step 3(c): Add an MX Record
Click + Add Record.
Select MX Record.
In the Domain Name field, enter the host value.
In the Mail Exchange Server field, enter the mail server address.
Specify the Priority value as provided by the email service provider.
Click OK or Save.
Example:
Plain Text
Domain Name: domain.com
Mail Exchange Server: mail.protection.outlook.com
Priority: 0
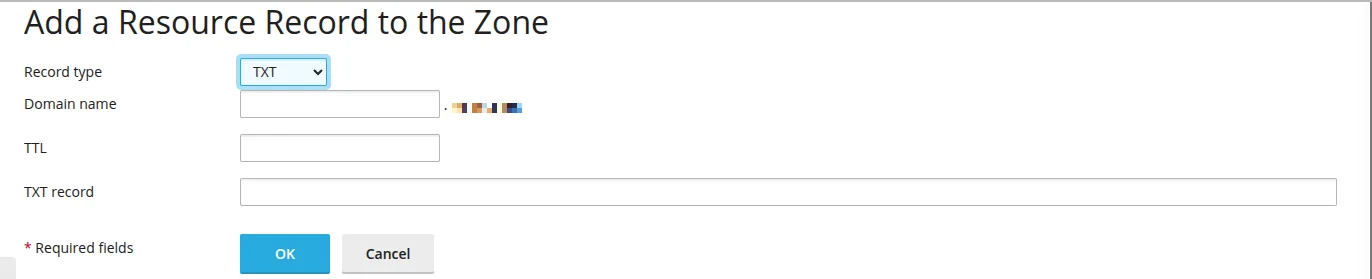
Step 3(d): Add a TXT Record
Click + Add Record.
Select TXT Record.
In the Domain Name field, enter the host value.
In the TXT Record field, enter the value provided by the service provider.
Click OK or Save.
Example:
Plain Text
Domain Name: domain.com
TXT Record: v=spf1 include:spf.protection.outlook.com -all
Verification
Confirm the newly added record appears in the DNS record list.
Verify there are no typing mistakes in the hostname or destination values.
Allow time for DNS propagation if required.
Verify the associated service functions correctly:
Website loading successfully (A Record)
Alias resolution working (CNAME Record)
Email delivery functioning correctly (MX Record)
Domain verification completing successfully (TXT Record)
Troubleshooting
DNS Record Not Working
Verify the correct record type was selected.
Check all values for spelling mistakes.
Ensure duplicate conflicting records do not exist.
Website Not Resolving
Verify the IP address entered in the A Record.
Check DNS propagation status.
Email Delivery Issues
Confirm MX server values are correct.
Verify MX priority values match the provider's requirements.
Domain Verification Fails
Ensure the TXT value matches exactly as provided.
Wait for DNS propagation to complete.
DNS Changes Not Visible
Clear local DNS cache.
Check DNS propagation using public DNS lookup tools.
Allow up to 24-48 hours for global DNS propagation.
Screenshot References
Plesk Dashboard
Hosting & DNS Section
DNS Management Button
DNS Management Interface
Add A Record
Add CNAME Record
Add MX Record
Add TXT Record
- dns
- dns records
- plesk