
Add a Guest User in office365
This article explains how to invite an external user as a Guest User in Microsoft Entra ID (Azure AD) and send an invitation for collaboration with your organization.
Summary
This article explains how to invite an external user as a Guest User in Microsoft Entra ID (Azure AD) and send an invitation for collaboration with your organization.
Applies To
Microsoft Entra ID
Microsoft 365
Prerequisites
Before proceeding, ensure the following:
Administrator access to the Microsoft Entra Admin Center.
Appropriate role assignment such as:
Guest Inviter
User Administrator
A valid external email address (Gmail, Outlook.com, or another organization's email address).
Resolution
Step 1: Sign in to Microsoft Entra Admin Center
Browse to the Microsoft Entra Admin Center:
URL:
Sign in using an administrator account.
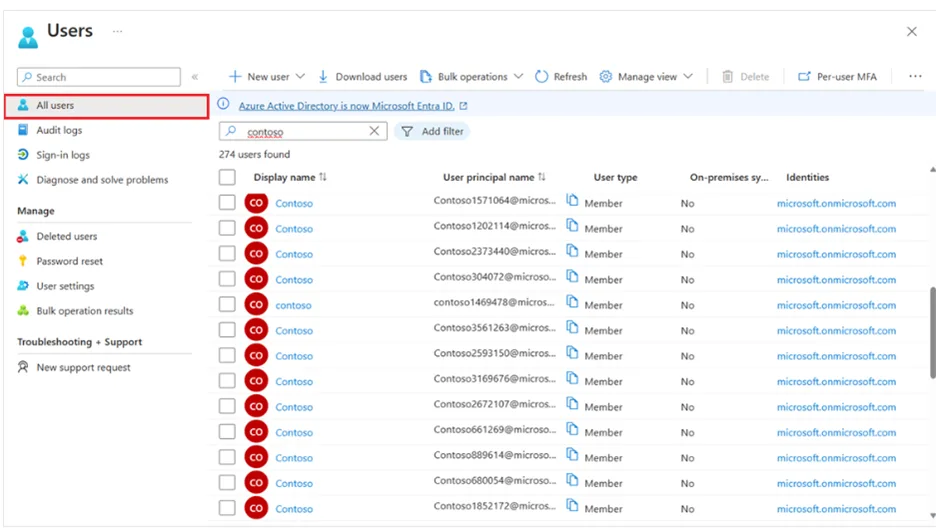
Step 2: Navigate to Users
From the left navigation pane:
Microsoft Entra ID → Users
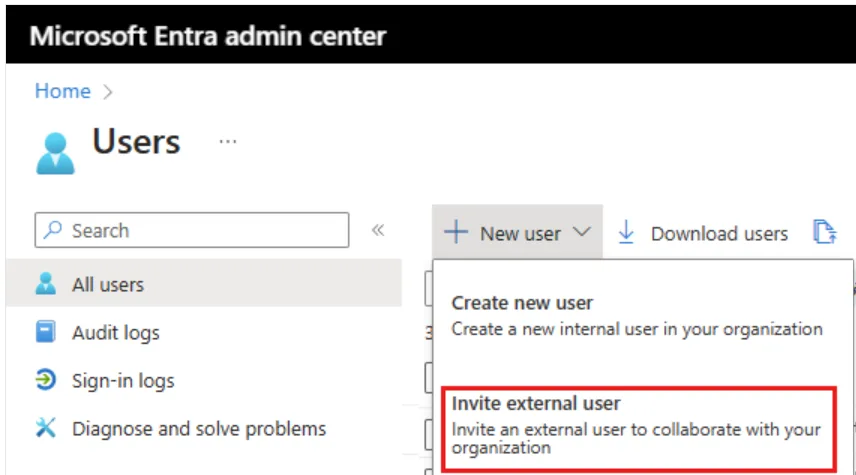
Step 3: Click Invite External User
Select Invite External User from the top menu.
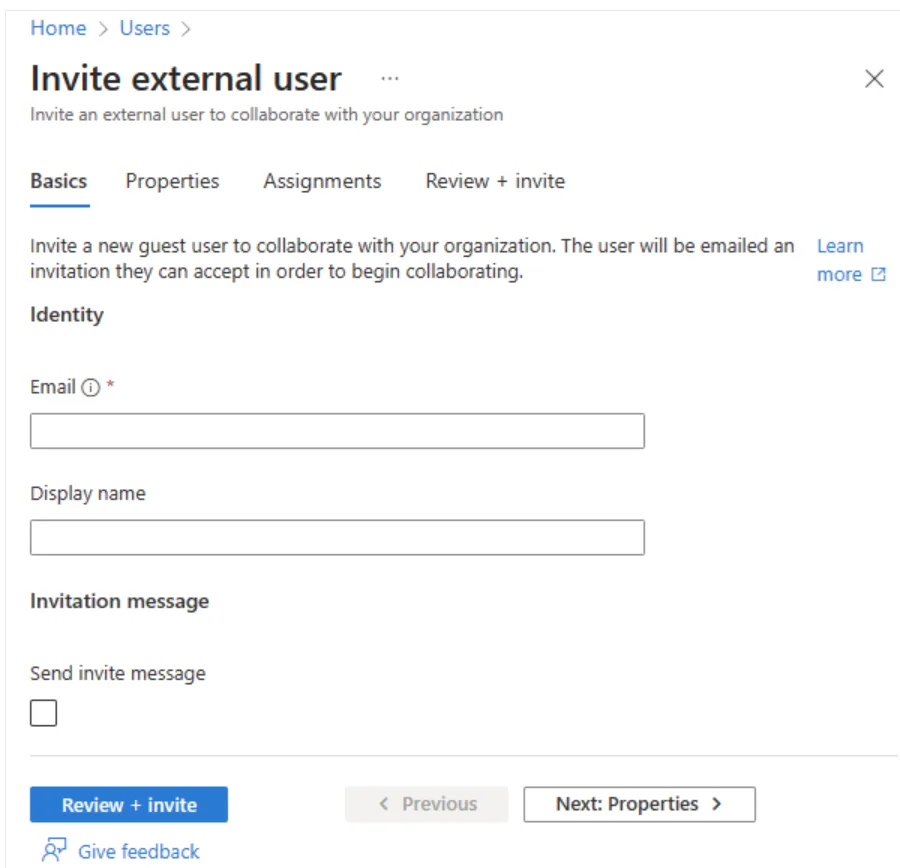
Step 4: Enter Guest User Details
Under the Basics tab, provide the following information:
Email Address: External user's email address
Display Name: Name of the guest user
First Name (Optional)
Last Name (Optional)
Enable Send Invite Message.
Click Review + Invite.
Verify:
Guest email address
Display name
Invitation settings
Click Invite.
Microsoft Entra ID automatically:
Creates the Guest User account.
Sends an invitation email to the external user.
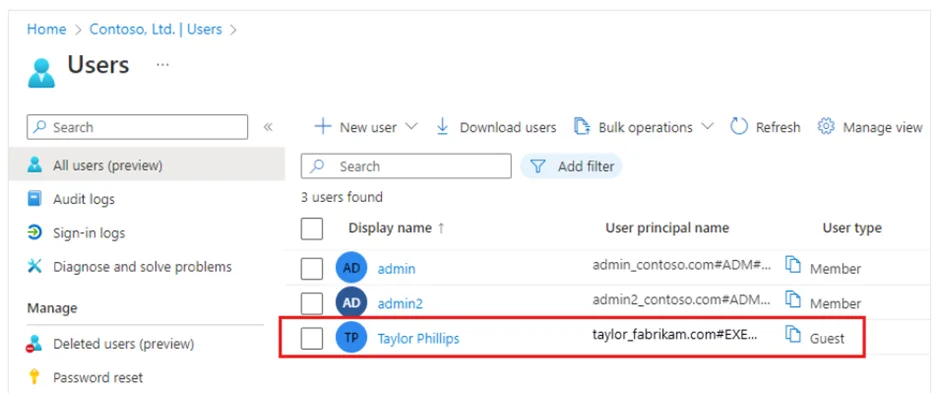
Step 8: Verify Guest User Creation
After the invitation is sent, the guest account appears under:
Microsoft Entra ID → Users
The user type will be displayed as:
Guest
Accepting the Invitation (Guest User)
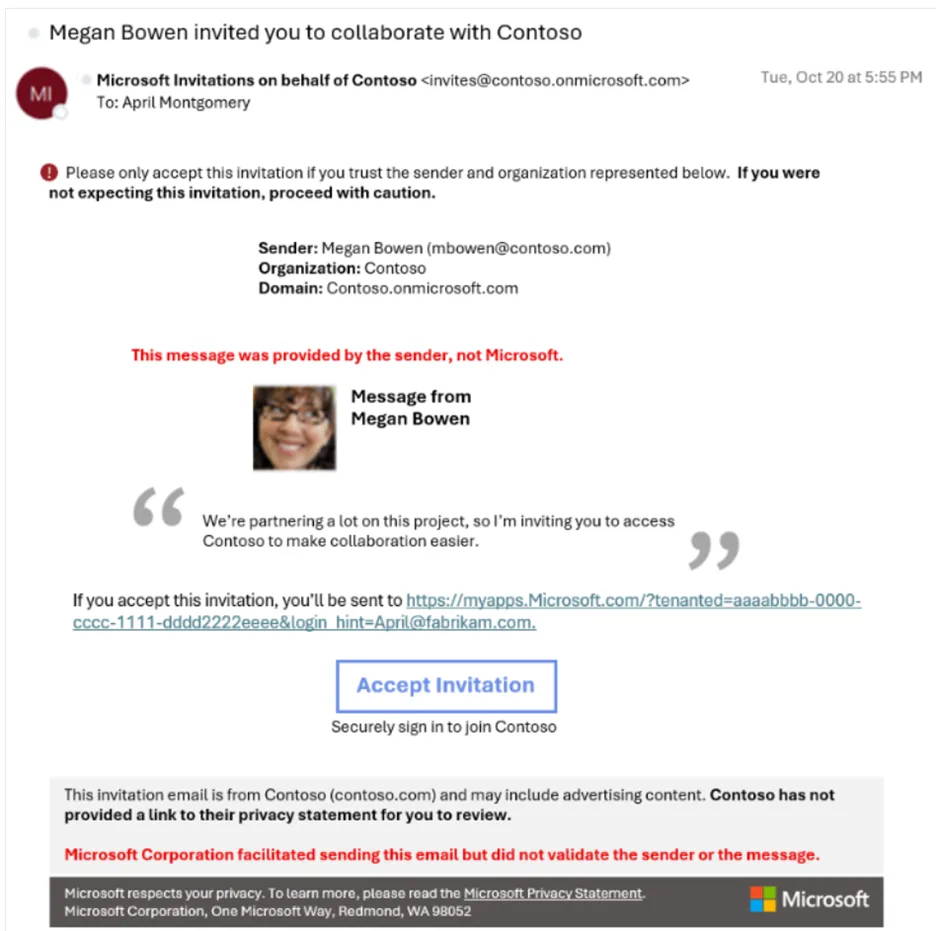
Step 1: Open Invitation Email
The guest user receives an email invitation from Microsoft.
Open the email and click:
Accept Invitation
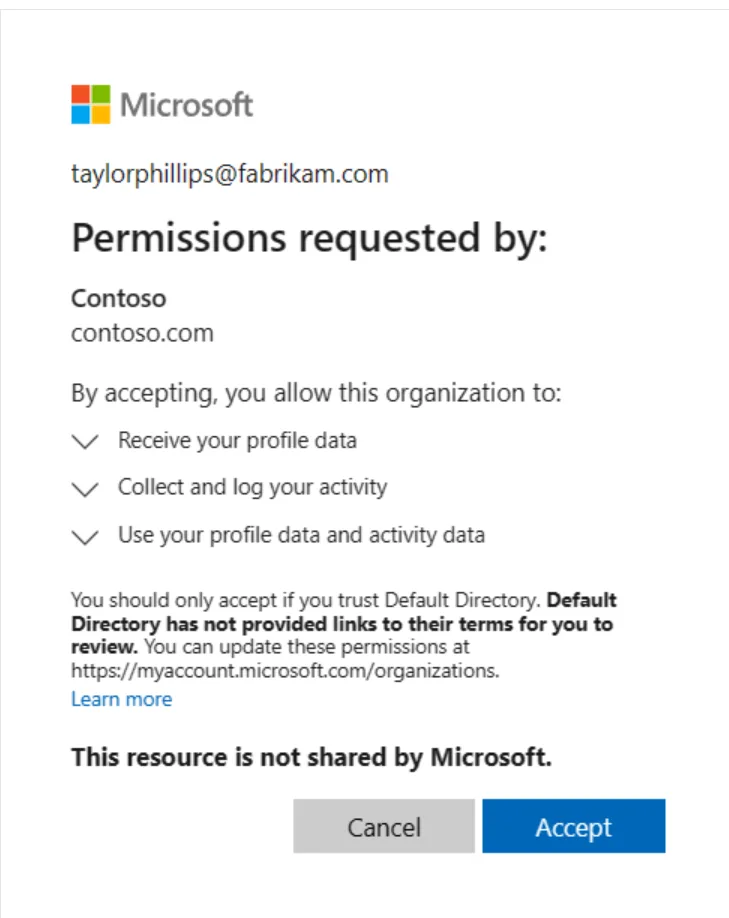
Step 2: Accept Permissions
A browser window opens displaying the organization's access request.
Click Accept.
Step 3: Access My Apps Portal
After successful acceptance, the guest user is redirected to the My Apps portal.
If applications are assigned to the guest user, they will be displayed here.
Verification
To verify successful guest user creation:
Open Microsoft Entra Admin Center.
Navigate to Users.
Search for the invited user.
Confirm:
User exists.
User Type is Guest.
Invitation status is accepted (if redeemed).