
How to Install SSL Certificate on Webuzo Panel
This article explains how to install an SSL certificate on a domain using the Webuzo control panel to enable secure HTTPS access.
Summary
This article explains how to install an SSL certificate on a domain using the Webuzo control panel to enable secure HTTPS access.
Applies To
Webuzo Panel, Cloud Hosting, Linux Servers
Symptoms
Website shows 'Not Secure' warning in browser
HTTPS is not enabled for the domain
SSL certificate is missing or expired
Cause
SSL certificate is not configured or improperly installed in Webuzo panel.
Resolution
Step 1: Create CSR from Webuzo
1. Log in to your Webuzo Admin Panel.
2. Navigate to 'SSL Utilities' section.
3. Select Certificate Signing Requests and fill the details.
4. Then click to Create for creating CSR.
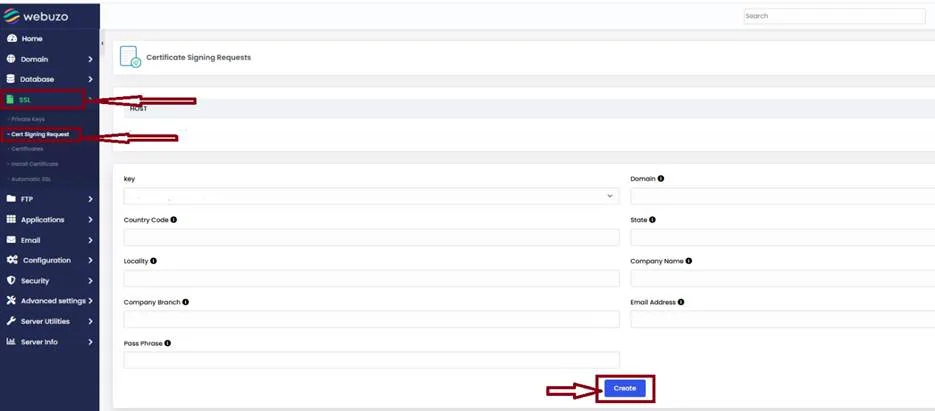
Step 2: After CSR generation provide the CSR to SSL certificate provider. They will provide you verification method to complete verification process.
Step 3: Once you have completed the verification process, the SSL provider will provide you with the SSL certificate file.
Step 4: Uploading SSL certificate file in Webuzo
1. Log in to your Webuzo Admin Panel.
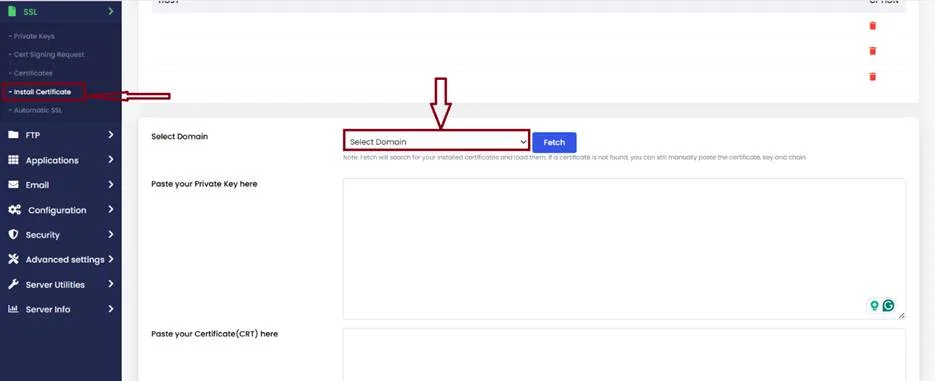
2. Navigate to 'SSL Utilities' section.
3. Select Install Certificate
4. Paste the Certificate (CRT), Private Key (KEY), and Certificate Authority Bundle (CABUNDLE) in the respective fields.
5. Click on 'Install'.
Verification
Visit your website using https:// and confirm that the browser displays a secure padlock without warnings.
Troubleshooting
Ensure correct SSL certificate, private key, and CA bundle are used.
Clear browser cache and SSL state.
Verify domain DNS is pointing to the correct server.
Restart web services if changes do not reflect.