
How to Configure a Catch-All Mailbox in Microsoft 365 (Exchange Online)
Summary
A catch-all mailbox allows you to receive emails sent to invalid or non-existent email addresses within your domain. Instead of the sender receiving a bounce-back message, the email is redirected to a designated mailbox.
Applies To
Microsoft 365
Exchange Online
Symptoms
You want emails sent to non-existent addresses (for example, sales1@yourdomain.com) to be delivered to a specific mailbox rather than being rejected.
Resolution
Step 1: Create a Catch-All Mailbox
Sign in to the Microsoft 365 Admin Center.
Navigate to Users > Active users.
Click Add a user.
Create a mailbox such as catchall@yourdomain.com.
Assign the required license and complete the setup.
Step 2: Access the Exchange Admin Center
Sign in using your administrator account.
Step 3: Create a New Mail Flow Rule
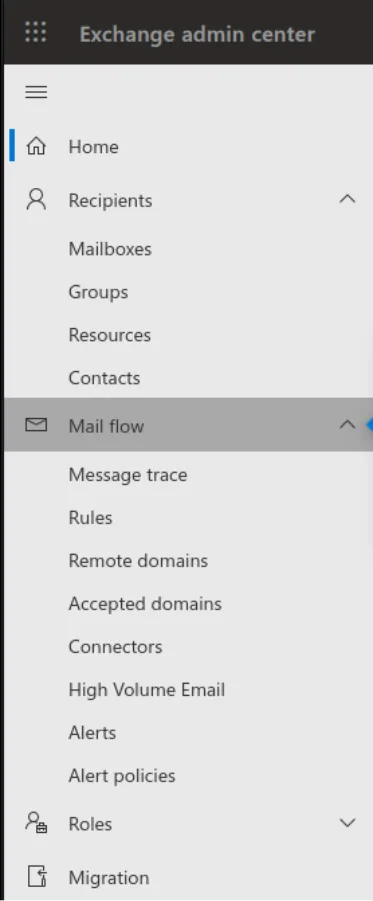
Go to Mail flow > Rules.
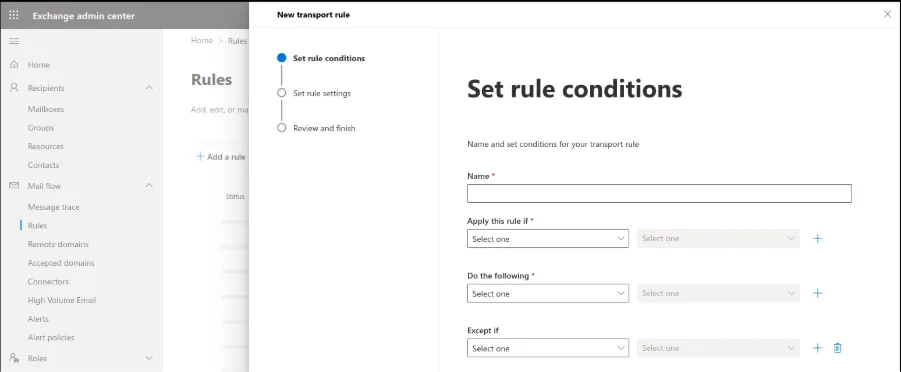
Click + Add a rule and select Create a new rule.
Enter a name for the rule, such as Catch-All Rule.
Step 4: Configure the Rule Conditions
Under Apply this rule if, select The recipient is located.
Choose Inside the organization.
Click Add condition.
Select The recipient does not exist.
Step 5: Configure the Rule Action
Under Do the following, select Redirect the message to.
Choose the catch-all mailbox created earlier (for example, catchall@yourdomain.com).
Step 6: Configure Exceptions (Optional)
Under Except if, click Add exception.
Select the required condition.
Choose the users or mailboxes that should be excluded from the rule.
Step 7: Save and Enable the Rule
Click Next.
Review the configuration.
Click Finish or Save.
Verify that the rule is enabled.
Verification
Send a test email to a non-existent email address within your domain.
Confirm that the email is delivered to the catch-all mailbox.
Verify that no bounce-back message is generated for the sender.
Troubleshooting
Emails Are Not Being Redirected
Verify that the rule is enabled.
Confirm that the catch-all mailbox exists and is licensed.