
Connect to an FTP Server Using FileZilla
This article provides step-by-step instructions for connecting to an FTP server using FileZilla and uploading files to the server
Applies To
FileZilla Client, FTP Hosting Accounts, Windows, macOS, and Linux Systems.
Symptoms
Unable to connect to an FTP server or upload files using FTP.
Cause
Incorrect FTP settings or transfer mode configuration.
Resolution
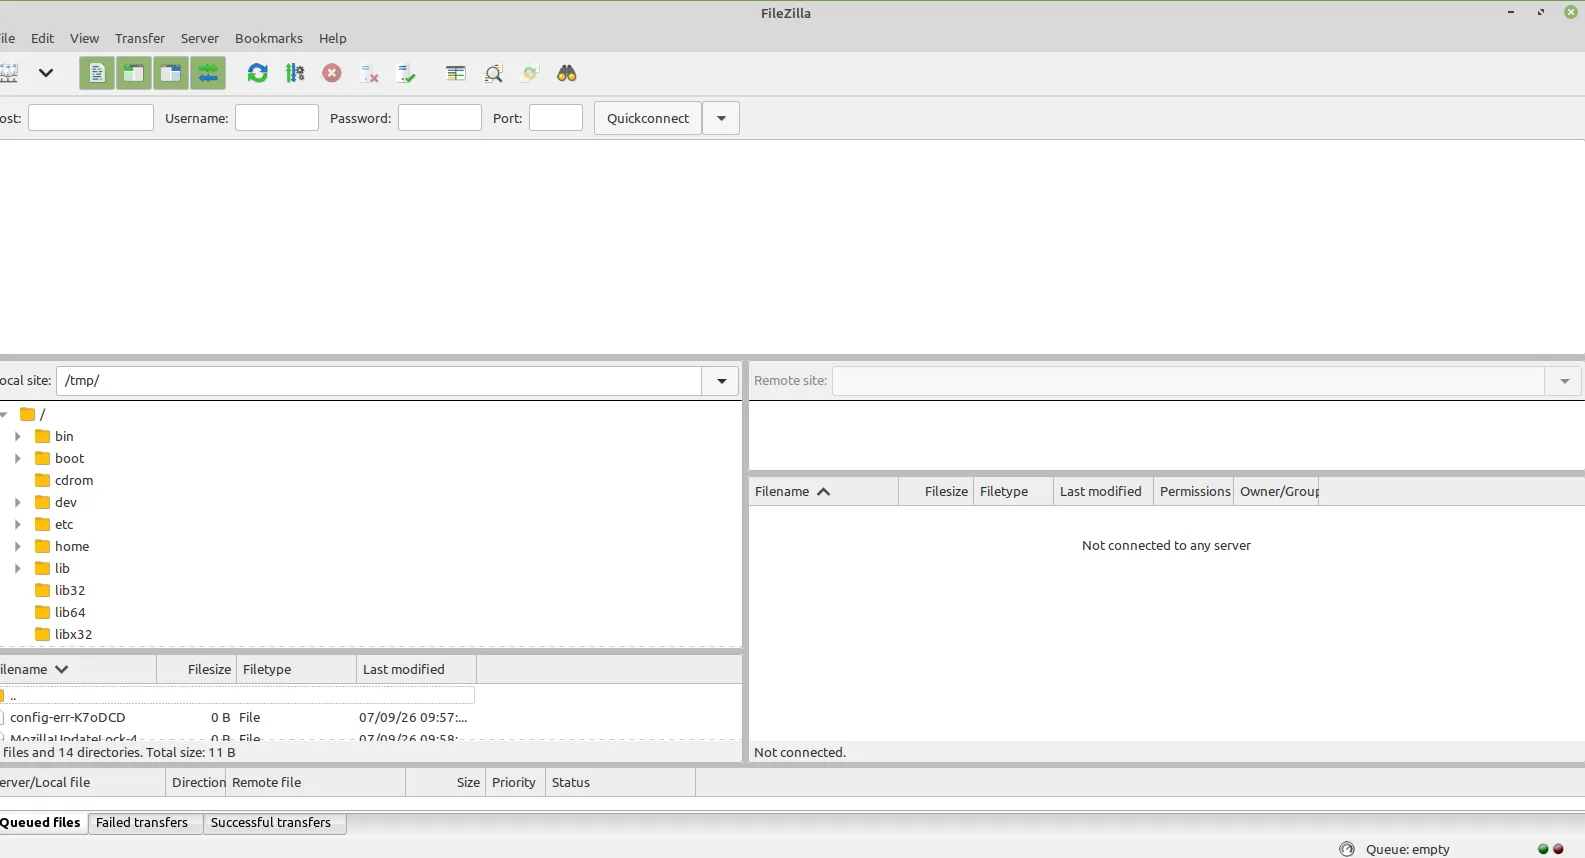
Step 1: Open FileZilla
Launch FileZilla.
Click File.
Select Site Manager.
Step 2: Create a New Site
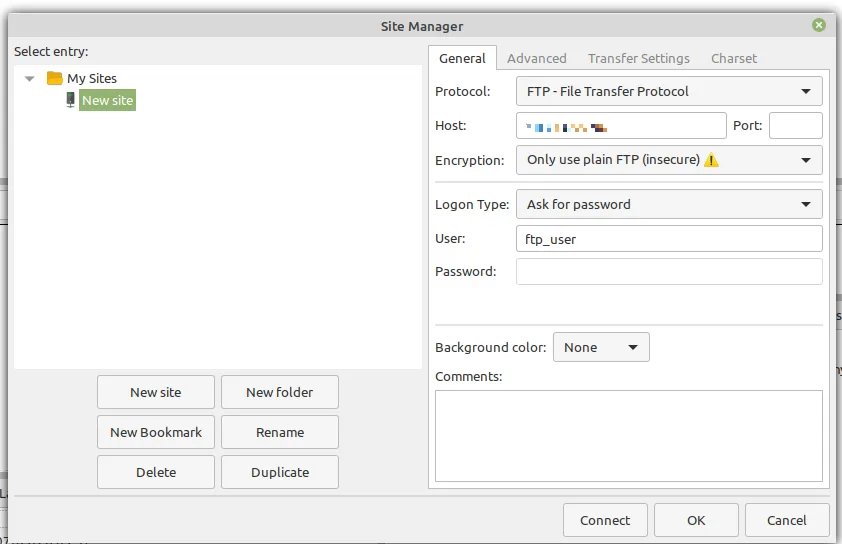
Click New Site.
Enter a name for the connection.
Step 3: Configure FTP Settings
Enter server IP address as the Host
Select Protocol as FTP.
Set Encryption to Use Plain FTP.
Set Logon Type to Normal.
Enter the FTP username and password.
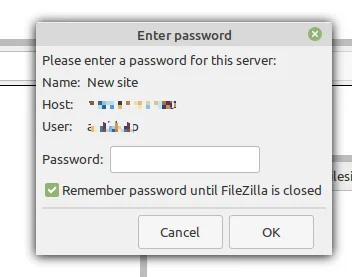
Step 5: Connect to the Server
Click Connect and wait for the connection to be established.
Step 6: Upload Files
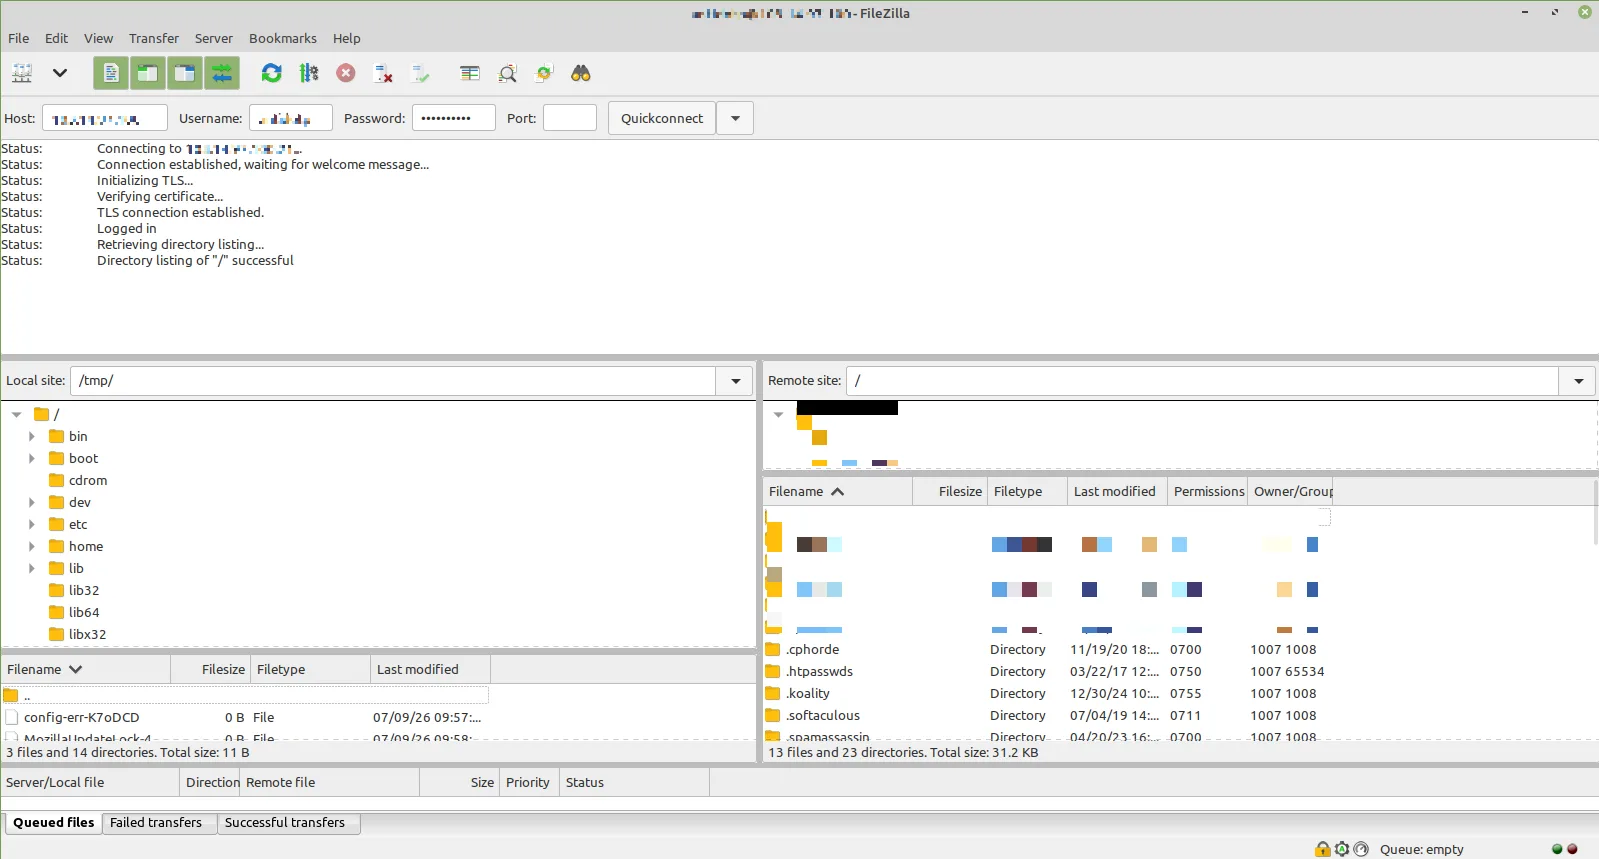
Use the left panel to browse local files.
Use the right panel to browse server files.
Double-click a file to upload it or drag and drop it from left to right.
Step 7: Monitor Upload Progress
Check the transfer queue in the bottom panel.
Wait until all file transfers are completed before disconnecting.
Verification
Confirm uploaded files appear in the server directory.
Verify the Successful Transfers queue is empty of errors.
Check the website or application reflects the uploaded files.
Troubleshooting
Verify FTP credentials are correct.
Switch between Active and Passive transfer modes.
Check firewall or antivirus restrictions.
Ensure the FTP service is running on the server.
- FTP
- FILEZILLA