
How to Add DNS Record from Client Area
This article explains how to add DNS records through the Client Area.
Step 1: Login to Your Client Area
Log in to the QualiSpace Client Area using your credentials from the below URL:
https://shop.qualispace.com/Once logged in, you will be redirected to the dashboard.
Click Domains from the top menu.
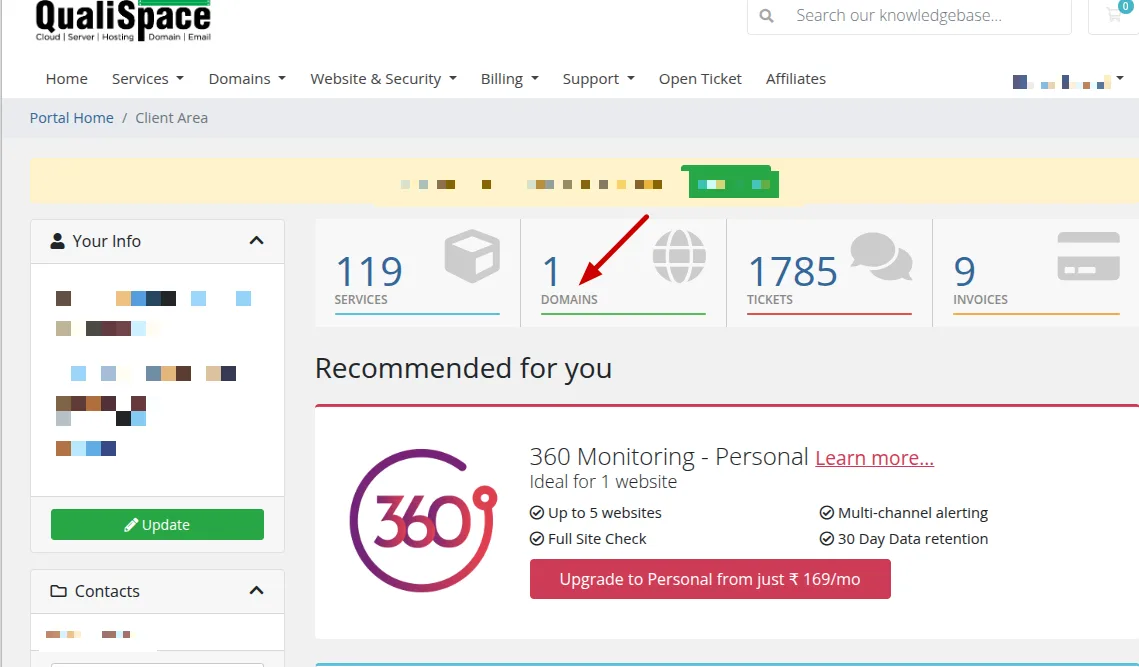
Step 2: Select the Domain
A list of domains purchased through QualiSpace will be displayed.
Click the blank space next to the domain name to manage the domain.
Do not click on the domain name itself, as it will redirect to the website instead of the management panel.
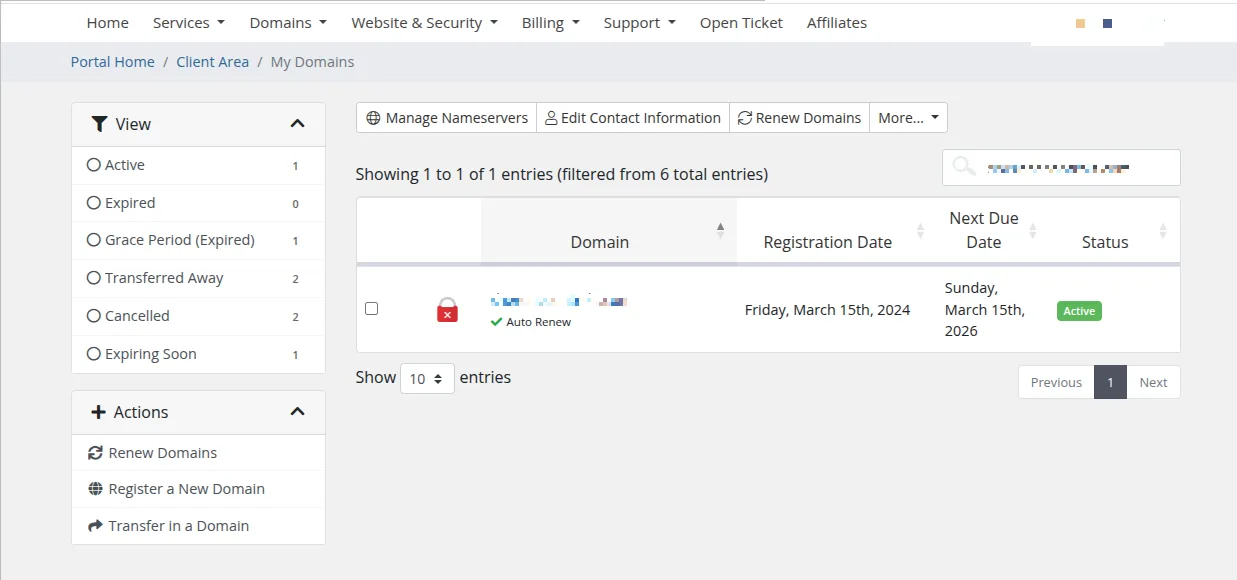
Step 3: Open DNS Management
The domain management panel will open.
Click DNS Management from the left-hand navigation menu.
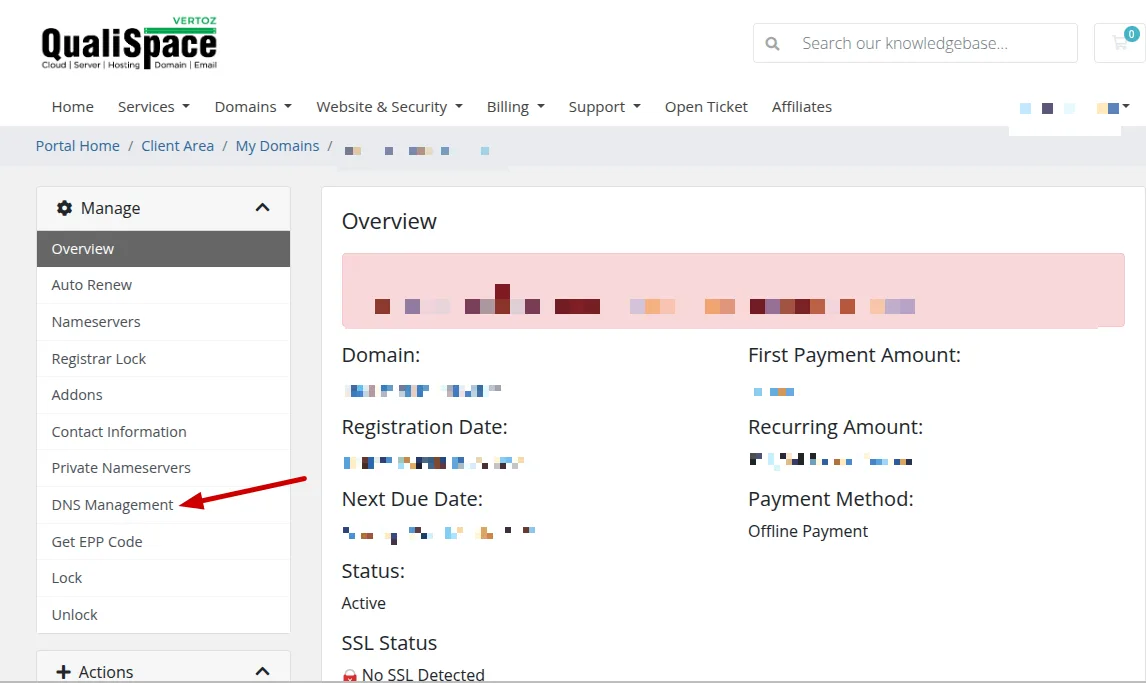
Step 4: Add an A Record
Under Record Type, select A Record.
Enter the domain name or subdomain in the Hostname field.
Enter the destination server IP address in the Address field.
Click Add or Save Changes.
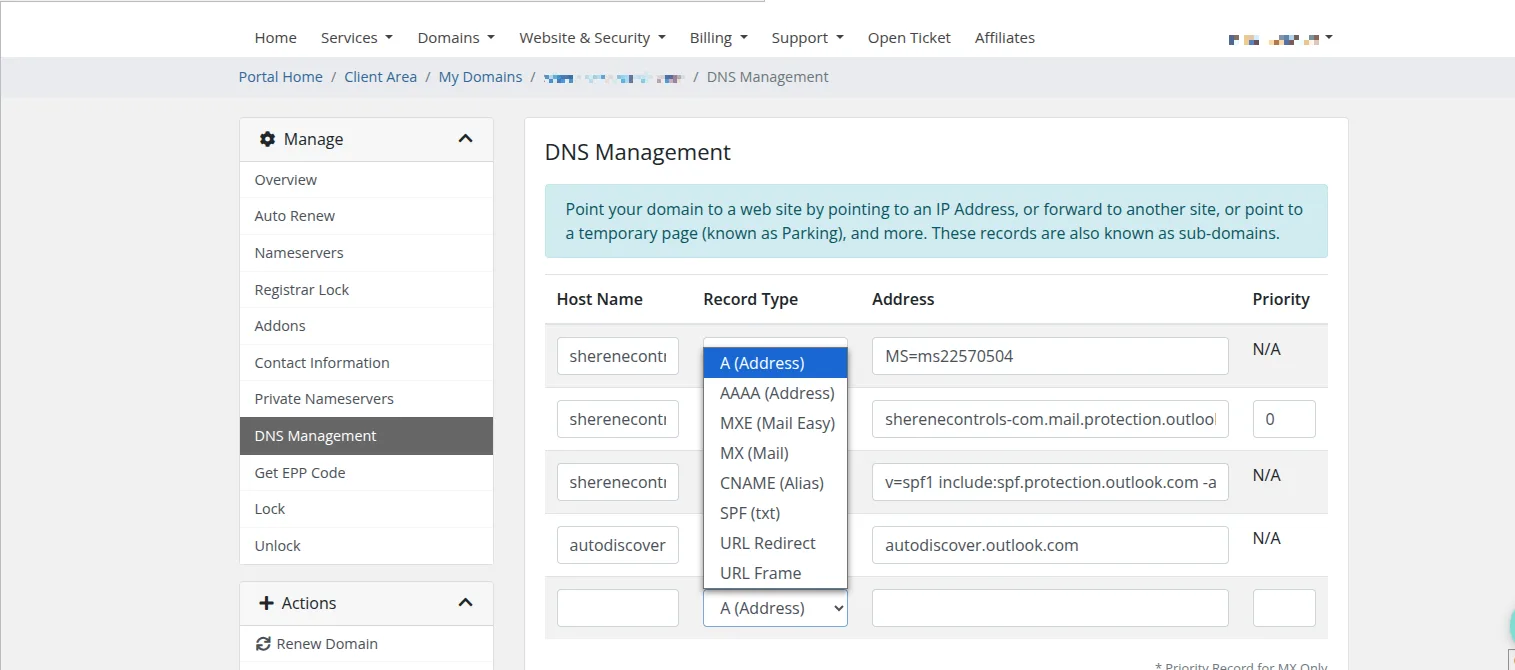
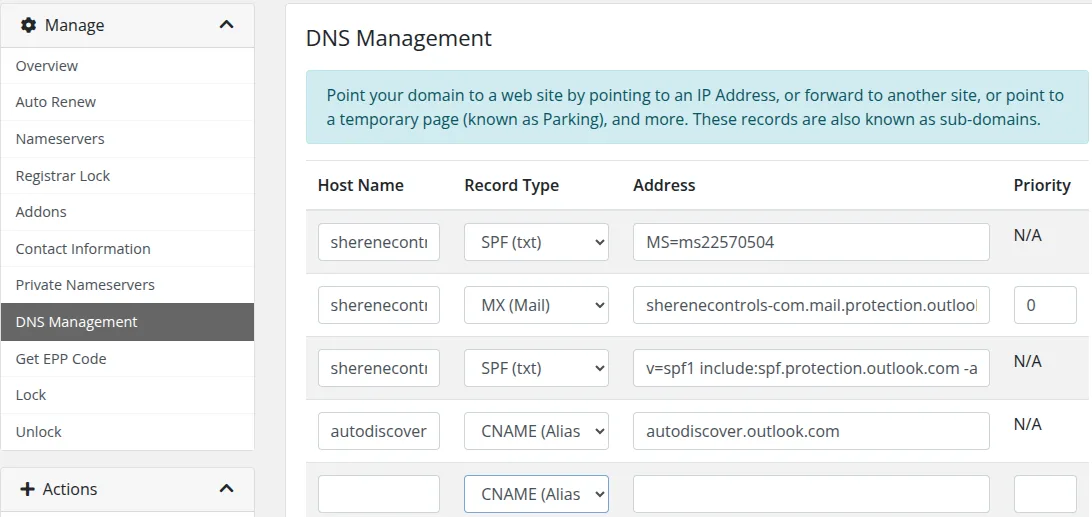
Step 4(a): Add a CNAME Record
Under Record Type, select CNAME Record.
Enter the host value in the Hostname field.
Enter the CNAME target provided by the service provider in the Address field.
Click Add or Save Changes.
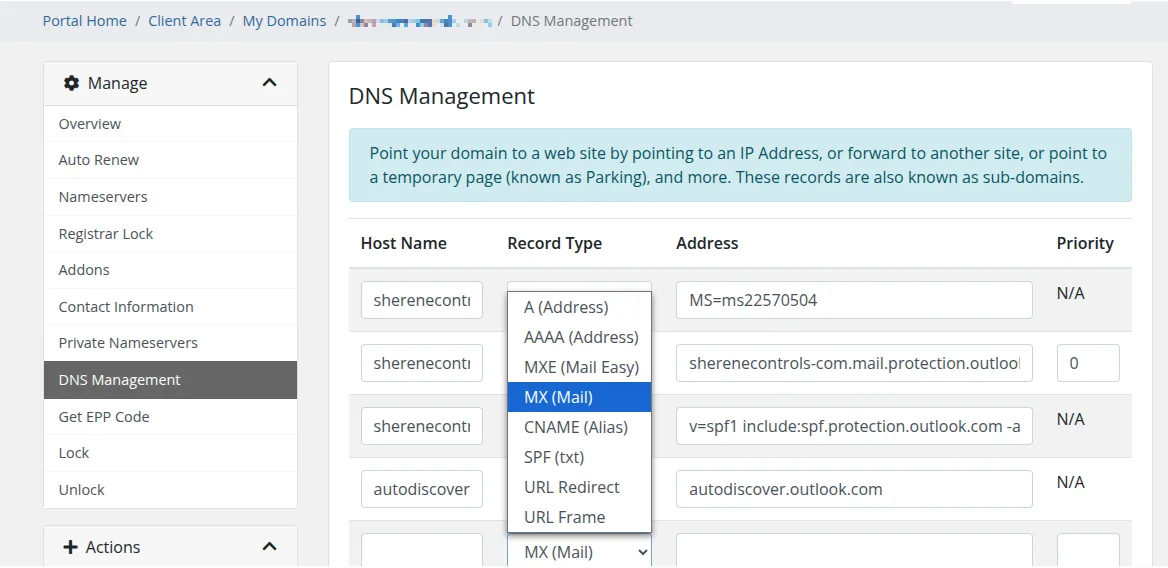
Step 4(b): Add an MX Record
Under Record Type, select MX Record.
Enter the value in the Hostname field.
Enter the mail server address in the Address field.
Specify the Priority value as provided by the email service provider.
Click Add or Save Changes.
- dns
- dns records
- mx
- cname
- A
- shop
- client area