- Sign in to your Google Admin console.
- From the Admin console Home page, go to Groups.

- In the upper left, click Create group.
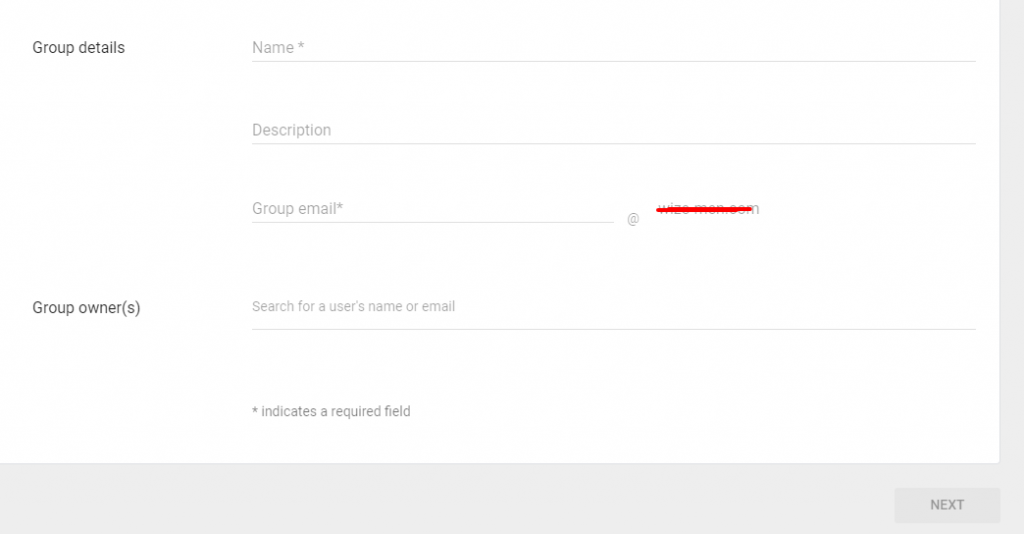
- Enter the following information, then click Next:

- Name: A name that identifies the group in lists and messages.
- Description: The purpose of the group or how it’s used. You could include information about group members, group content, FAQs, links to related groups, and so on
- Group email: The address used for sending email to all members of the group. If your organization’s Google Account has multiple domains, select the appropriate domain from the list. Email addresses can be up to 63 characters long.
- Group owner(s): Search for the name or email address of users who will have the owner role for this group.
5. Choose settings for group members with owner, manager, and member roles. Then choose whether the group is open to the entire organization and people outside the organization (external users):
- Access type:
- Public—Open to anyone in your organization. Depending on your settings, it can also be open to people outside your organization. Groups with the Public setting might get more spam messages. Malicious senders often send spam to email addresses they find on public websites.
- Team—Open to a specific team in your organization. Select this setting to create a group for a specific internal department or team.
- Announcement only—Used to broadcast information to a group. For example, use this setting for a group that receives company news.
- Restricted—A private group setting for employees who share private or sensitive information.
- Custom—Shows that settings have been manually configured.
- Access Settings:
Choose settings for each category of users. These settings form the basis of what people are allowed to do in the group
- Contact owners—Who is allowed to email group owners directly.
- View members—Who is allowed to view group members.
- View topics—Who is allowed to view topics posted in the group. Non-members outside your organization (External) can only view topics if Groups for Business sharing options are set to Public on the Internet.
- Publish posts—Who is allowed to publish messages to the group.
- Membership settings:
Choose whether group members who have the owner, manager, or member role can add people to the group directly, invite people to join the group, and approve requests to join the group.
- Who can join the group:
- Anyone in the organization can ask—People in the organization must ask and then be approved before they can join the group
- Anyone in the organization can join—People in the organization can add themselves to the group directly
- Only invited users—People can join the group only if they’re invited.
- Allow members outside your organization:
Turn this setting off to prevent external people from being added to the group. Or turn the setting on to allow external people in the group.
7. Click Create Group.Wait a few minutes for your new group to become active before sending a message to it. Otherwise, you might get a notification that your message couldn’t be delivered.
